litecoin miners windows

By now you’ve probably seen our Linux Litecoin mining setup guide (and hopefully the hardware guide that preceded it).Perhaps you’ve decided that Linux just doesn’t seem like your cup of tea.If Windows is more your thing, you’re in luck—this guide is for you.Let me just reiterate that for most people, Linux is likely the better choice.With Linux, you can use a $5 USB stick instead of a $50 harddrive, and you save yourself the cost of a Windows license as well.The actual mining performance will be the same on either platform, so the cost savings of Linux would seem to make it a no-brainer as long as you’re comfortable with the slightly more complex setup (although our guide makes it simple!).However, if you have GPUs that aren’t voltage-locked (such as the MSI 7950s that we recommend in our hardware guide), and you plan to take advantage of that feature to undervolt your cards (we’ll show you how), Windows might become the better long-term option for you, depending on how much electricity costs in your area (edit 10/2013: easy undervolting in linux is now possible, too).

So with that in mind, if Windows sounds like it’s the right choice for you, read on for our setup guide!I’m not going to go into quite as much detail as I did with our Linux setup guide, as most of you are probably already quite comfortable with basic Windows tasks.The steps outlined below should be adequate for the average Windows user, but feel free to leave comments if anything is unclear or missing.Before we even get to Windows, make sure your mining computer’s BIOS settings are in order.Power on your computer, and press the “delete” key a few times immediately after power on.You should end up in the BIOS configuration area.Do the following, then save & exit: Any 64-bit edition of Windows 7 should work fine (32-bit installations should work too, but may require tweaking the settings that I provide).Windows 8 should work as well, although I have not tested it myself.Feel free to use the cheapest SATA hard drive that you can find, as it won’t impact mining performance.
I’m going to assume that everyone reading this is capable of installing a fresh copy of Windows 7.Complete the installation and boot into the Windows desktop before proceeding to the next step.
bitcoin wiki difficultyIf necessary, also install the LAN/Ethernet driver that came with your motherboard so that you can get online.
calle bitcoin madridWhile this step isn’t strictly necessary in order to get you mining, it is strongly recommended.
cs go bitcoin miningRepeat the above two steps until there are no more updates to install.
bitcoin djangoDepending on how old your Windows installation media is, this process could take quite awhile.
revista epoca bitcoin
We want our mining rigs to boot up and start mining without any intervention on our part.We’ll need to enable auto-login for that to happen.
litecoin rss feedBy default, Windows will go to sleep after 30 minutes without user interaction.
bitcoin mining xbox oneObviously, we don’t want that behavior on our mining rigs.
bitcoin konto schweizTo disable it: The latest version of the Catalyst drivers (13.x) are known to cause issues when mining.
ethereum block time chartVersion 12.8 and 12.10 are generally regarded as the best mining options (I’ve opted for 12.8).Some versions of the SDK can cause issues as well (I’m using 2.7, as the 2.8 SDK is known to be buggy with cgminer).Note that these drivers are for Radeon 7xxx series GPUs (like the 7950 that I recommend in part 1 of this guide).

If you’re using another GPU, you’ll need to go to the AMD site and get appropriate drivers.Download v12.8 of the Catalyst display drivers (the link is to the 64-bit version, here are the 32-bit drivers if you need those instead—although I highly recommend a 64-bit installation if possible).When the download is complete, install the display drivers.Make sure to do a custom install and deselect everything except the actual drivers (eg: don’t install the 2.8 SDK!).You’ll need to reboot to complete the installation.Download v2.7 of the Catalyst App SDK (again, this is 64-bit, the 32-bit version is here).When the download is complete, install the SDK.Important: you may need to have something plugged into each GPU to prevent the OS from idling it.You can plug 3 monitors into your 3 GPUs, but that isn’t very practical.The easiest option is to create 3 dummy plugs, and leave them attached to your GPUs.They’ll “trick” the OS into believing that a monitor is attached, which will prevent the hardware from being idled.

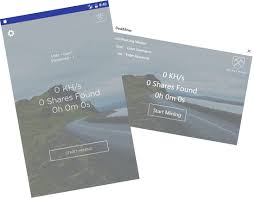
Check out how to create your own dummy plugs.Cgminer is the mining software we’ll be using.Download the cgminer archive (if this link is broken, check the cgminer website for the latest version and download that).Extract the downloaded archive into a folder on your mining computer (you may need 7-zip to extract it).Open the folder where you extracted cgminer, and create a new text file called “mine_litecoins.bat” (you can use notepad for this).Enter the following text into your mine_litecoins.bat file (make sure to substitute your own pool user name and password—see note below): timeout /t 30 setx GPU_MAX_ALLOC_PERCENT 100 setx GPU_USE_SYNC_OBJECTS 1 :3334 -u [USER] -p [PASS] Note that the cgminer settings we’re using in our mine_litecoins.bat script correspond to a good starting point for Radeon 7950 series GPUs.If you followed our hardware guide, these settings will give you good hashrates.If you’re using another type of GPU, you’ll want to use Google to find optimal cgminer settings for it.

Also note that you’ll need to create an account at one of the litecoin mining pools, and plug your username and password into the script (the -u and -p parameters).I have Coinotron in there as an example, but there are quite a few to choose from.We want cgminer to automatically start mining whenever the rig is powered on.That way, we keep mining losses to a minimum whenever a power outage occurs, and we don’t have to worry about manually starting it back up in other situations.You should see a shortcut to your mine_litecoins.bat batch file appear in the startup folder.Windows should automatically execute it upon bootup.At this point, we’re done with the essentials.If you’ve done everything correctly, you should be able to reboot and watch your rig automatically start mining shortly after the Windows desktop loads.There are a couple more steps that may be important to you, though.If you have GPUs that aren’t voltage-locked, like the cards I recommended in our hardware guide, then this is the main advantage Windows has over Linux.

Unfortunately, the AMD ADL for Linux imposes some artificial limits on voltage settings that aren’t present in Windows.Thus, in Windows, it’s possible to lower the voltage on certain GPUs, which will result in a significant power savings—without negatively affecting performance!Disclaimer: changing the factory voltage settings on your GPU can result in system instability, crashes, and/or damage.Proceed at your own risk!When the download is complete, extract the archive and install Afterburner.After installation, open Afterburner (you may be prompted to reboot—do so if asked).Click the “settings” button in the lower right, and enable every option on the “general” tab, except auto-update (the last one).Now you should be able to change the voltage settings on your GPUs, assuming your card supports it.If you’re using the MSI 7950 from our hardware guide, 1087 mV is a good place to start.Click the “auto apply overclock settings on startup” button, and minimize Afterburner.

MSI Afterburner will auto-start at bootup, and your voltage settings will be applied automatically.For me, running a rig with our recommended hardware, using Afterburner to undervolt GPUs resulted in a ~150w reduction in power usage.Pretty significant considering the rig runs 24/7!Configuring remote administration will allow you to disconnect the monitor, keyboard, and mouse from your mining rig and manage it from another computer—even over the internet, if you wish.The Windows built-in Remote Desktop Administration feature unfortunately isn’t a great option, as it messes with the GPU driver and will prevent cgminer from reading temperature information properly.Fortunately there are a host of other options available.I recommend TightVNC or Google Chrome Remote Desktop.Both are lightweight, simple, and free.Here are the basic setup instructions for TightVNC: That’s it—you’re done!You’ll probably want to test everything now.The easiest way to do that is to power down your miner.