how to mine litecoin 2014

Mining rigs come in all shapes and sizes.For the purpose of this guide, we will focus on building a very basic rig.This guide is intended to get you started and to assist in building your first rig.Once you know how to build one, you can grow your rig empire as big as you want.We will show you how to build your very first rig for under $1000.If you don’t want to invest any money in hardware and simply want to use your current computer to start mining, you can skip ahead to Part 2: Software Requirements.The first thing you need to know about mining, is that currently, mining power is processed using your graphic’s card (GPU).The days of mining with your CPU only are long gone.GPU offer a much faster way of solving the algorithms required to generate your coins.GPU’s should be your main focus when designing your rig.You can get a full list of the various GPU’s and their expected performances here: https://en.bitcoin.it/wiki/Mining_hardware_comparison or here: http://litecoin.info/Mining_Hardware_Comparison.

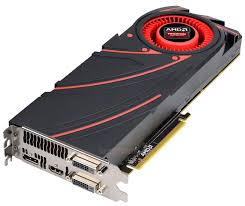
These are the most current and accurate listings for GPU hash rates.When you are mining, the same values that apply for Bitcoin mining will apply to any SHA-256 coin mining.The same is true for Litecoin and all other Scrypt based coins.We currently like the ATI HD 7950 card’s.We feel they currently offer the best bang for your buck if you are operating on a budget.Of course, you can always replace your graphics card for a better one in the future.Generally, there are only 3 things you want to worry about when building a mining rig.The rest of the hardware doesn’t really matter.Below are the components we recommend for a basic rig.Feel free to swap out parts for better performing ones if you wish.This is just a basic outline of a generic budget rig.This rig will get you anywhere between 1000-1200 kh/s when mining Scrypt coins and 950-1150 MH/s when mining SHA-256 coins.Once you are done, the rig will look something like this: Now comes the fun part.Now that you have all your components, you can start setting everything up!

Make sure to keep the manuals that came with the components in case you get stuck on a step.This is the part where you’re probably wondering why you didn’t get a monitor, keyboard, mouse or a CD drive.Basically, once you have everything setup, you won’t need them anymore.If you’re reading this and are interested in mining coins, you probably already have a computer in the house.
bitcoin and atoSimply take the monitor, keyboard and mouse and set it up on the rig temporarily so we can get things set up and configured.
litecoin rehcThe next step is simply to power it up and install an Operating System on the machine.
bitcoin raspberry pi nodeYou can install Windows or Linux from a USB key or CD-Rom drive.
litecoin fx
(If you install from CD, simply take a CD-Rom drive from another computer temporarily to get through the installation).To install windows from a USB key, you can follow this guide.The rest of the guide will assume you are using Windows.So, now you’ve got your rig installed with an operating system.Cryptocurrency mining malware has been discovered on digital video recorders (DVRs) manufactured for use in the security industry to record footage taken by surveillance cameras.
bitcoin mining onboard gpuJohannes Ullrich, dean of research with the SANS Technology Institute, posted on Monday that DVRs made by Hikvision, a video surveillance products and solutions supplier headquartered in China, were found to contain malware that mined for Bitcoins.
games like bitcoin billionaire that the malware was discovered while emulating a Synology disk storage device in an investigation of recent scans for port 5000.

He said a lot of the scans came from Hikvision DVRs.“After accessing a couple of the DVRs, we noticed that the malware was running on the DVR itself,” Ullrich said.“Two pieces of malware typically ran: a customized version of minderd, the Bitcoin miner – [we] actually learned today that, in this case, it may mine Litecoin, not Bitcoin – [and] a piece of software called cmd.so, which initiated the scans for Synology devices that we observed before and that led us to investigate the DVR.” It is not currently clear exactly how the DVRs, similar in concept to the ones used by consumers to record TV shows and fast-forward through commercials, are being infected with the cryptocurrency mining malware.Ullrich suggested that attackers are simply using the Telnet access – essentially a protocol used to access remote computers – because the compromised DVRs all appear to be in default configuration, meaning Telnet is exposed and the root password is set to default (12345).Although the DVRs were observed looking for Synology disk storage devices, the video recording machines are not the only devices at risk.

“We found one Linux based router that was also affected,” Ullrich said.“The larger picture here is that attackers move away from desktops as exploit targets as there are less vulnerable desktops out there.However, the number of badly protected devices is going up exponentially and they turn out to be very hard to patch and secure compared to desktops.” As of now, the best thing users can do to protect against this sort of attack is change the default password on their systems, Ullrich said.Posted by dconroy on Aug 13, 2013 in How To's, Raspberry Pi | 53 comments | 253,327 views First off, I know this post is a little late in the game as it is becoming less profitable for amateurs to mine Bitcoins, and that there are more efficient ways to go about this.But I am writing this anyways for posterity’s sake as I know for a fact there are people out there who have idle Raspberry Pis and are looking for a project.I’m sure there are also others like myself who are just looking to learn more about cryptocurrencies.

To get started, here is our shopping list (if you are reading this, you probably already own some of these items): *Prices are subject to change **The Pi alone can not power one of these miners, a Powered USB HUB is mandatory to mine bitcoin.Before we setup the Mining software on the Pi we need to setup a bitcoin wallet where we will store the credit from the mining.There are countless options(Software, Web, Mobile) when it comes to setting up a bitcoin wallet. has a great writeup on how to choose a wallet.Windows/MAC/Linux Multi-Bit – Quick and Lightweight Bitcoin Wallet Bitcoin-QT – Takes a day or two to download ~6gigs of Bitcoin Transactional Data Armory – Desktop Add-on Application iOS Currently the app store does not allow any bitcoin wallet applications.Bitcoin Pooled Mining is the best way to get started mining.Pooled Mining allows multiple users to work together to “crack” a single bitcoin and then share the benefits fairly.Due to the competitive nature of mining, if you tried to mine on your own it could be a long time before you successfully mined anything.
Pooled Mining is a nice way to receive smaller and more regular payouts instead.For people with slower rigs, pooled mining might be the only way you ever earn bitcoins.Two Mining pools I recommend and have verified are: Slush’s Pool BTC Guild The setup for both pools is straight forward.You create a username, password, and then worker credentials(for each mining device).You also add the bitcoin wallet address you created above to your pool so you receive bitcoin payments when you hit the pool’s payout thresholds (usually around .01 BTC).It’s also recommended you sign up for multiple pools in case one experiences technical difficulties, the software we are about to install will switch if one goes down.Now that we have a bitcoin wallet and have joined a mining pool, Neil Fincham and his project Mine Peon makes getting the software running on the rPi quite easy.Mine Peon is an ARM Mining Platform that is built specifically for Raspberry Pi.It is built on Arch Linux and uses the popular cgminer and bfgminer for the heavy lifting.

To get started, you simply download the latest image here and burn it to your SD card.If you are using Windows to flash your SD Card, I recommend using Win32DiskImager.This tool can also be used after our initial setup to create an image of our finalized implementation(very useful as a backup).After the image is flashed, you can boot your device.The first boot takes about a minute as it needs to generate the SSH keys, but future boots take only about 10 seconds.Use your router or keyboard/video/mouse to find out the IP address of the rPi.The default username and password for SSH and for the WebUI are: After the rPi has booted, you can navigate to Mine Peon’s handy WebUI by opening your browser and entering the Raspberry Pi’s IP address.There you can insert the mining pool and worker information.The best part about Mine Peon is that it automatically supports the USB mining devices, so you can be up and running in a few minutes without having to worry about drivers/compatability issues.